


You've treated the moss. You've scarified. You've seeded and fed. Now you're standing in the garden looking at what appears to be a churned-up muddy patch and wondering if you've made things considerably worse.
You haven't. But nobody warned you about this bit.
Lawn renovation has a predictable timeline and knowing it in advance is the difference between confidently waiting for results and anxiously applying more product at the wrong moment, which is one of the most common ways renovations fail.
This guide covers exactly what to expect week by week from the day you seed, why the ugly phase happens, and what the finished result actually looks like at 4, 8, and 12 weeks.
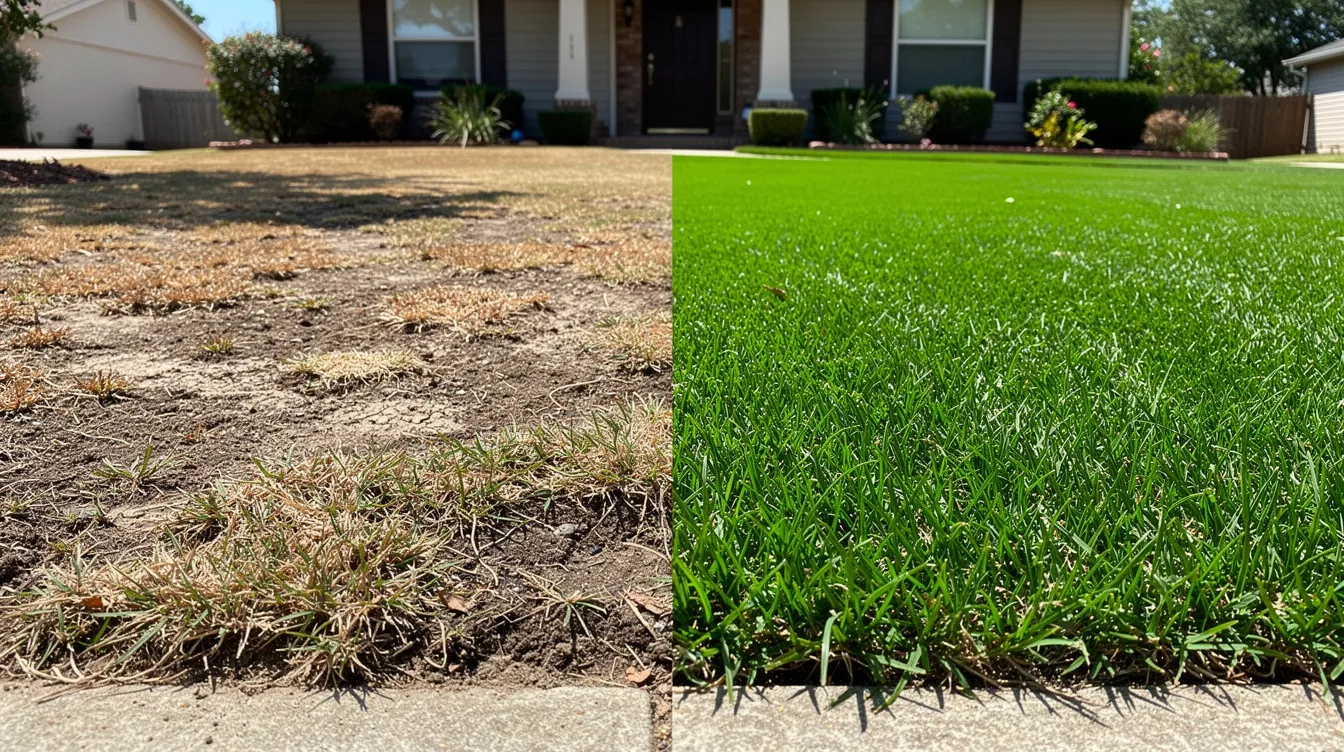
The Honest Answer: How Long Does Lawn Renovation Take?
First signs of germination: 7–14 days Visible coverage across patchy areas: 4–6 weeks Full establishment, thick, dense grass: 8–12 weeks Complete recovery from a severe renovation: one full growing season
These timelines apply to a correctly executed renovation: moss treated first, followed by simultaneous seeding, fertilising with mycorrhizal fungi, and bio-stimulant application. A renovation where the sequence was incorrect, particularly where moss wasn't treated before seeding, will produce slower or incomplete results regardless of how long you wait.
Three factors affect where your lawn falls within these ranges: season, soil temperature, and grass seed variety.
What Affects How Quickly Your Lawn Recovers?
Season and Soil Temperature
Grass seed germinates once soil temperature is above 7°C, and it germinates reliably above 8–10°C soil temperature. The warmer the soil within that safe range, the faster germination occurs.
Autumn renovation (September): early autumn is the best renovation window in the UK, with soil still warm from summer, typically 14–18°C. Germination in 7–10 days is typical. Strong establishment through autumn with a full growing season of root development before spring.
Spring renovation (April–May): soil is warming, typically 10–14°C by mid-April. Germination in 10–14 days. Solid results by early summer.
Summer renovation (June–August): soil is warm enough but surface temperatures are higher. Germination can be faster (7–10 days) but seedlings are more vulnerable to moisture stress. Consistent watering morning and evening is essential.
Late autumn or winter: below 8°C soil temperature, germination is unreliable. Seed may sit dormant for weeks. Not recommended.
Weather conditions matter: mild, consistent moisture helps, while dry weather or hot conditions increase moisture stress, especially in drought conditions after growth slows or before grass starts to recover.
Heavy clay soils and sandy loams warm and hold moisture differently, which affects seed rooting and timing.
The general rule is to overseed 2–3 weeks after scarifying, once the lawn's condition has settled and seed can contact the soil surface properly.
Grass Seed Variety
The GREENER Transformation Kit uses a professional perennial ryegrass mix. Perennial ryegrass is one of the faster-germinating UK lawn varieties, typically 7–10 days under the right conditions and establishes reliably in the UK climate.
Cheaper seed mixes containing high proportions of annual ryegrass may germinate slightly faster but produce a lawn that thins out within a season, requiring renovation again. Different lawn types need different sowing choices, so a quality seed mix or lawn seed matched to the site will usually outperform cheap annual-heavy blends.
Severity of the Starting Condition
A lawn with mild lawn problems, such as being 30% bare with some thin spots in high-traffic areas, often returns to good shape faster than one that is 70% moss with compacted, depleted soil, where compaction restricts water and nutrient penetration. Severely degraded lawns may need two renovation cycles — one autumn to address the structural problems and establish initial coverage, a second the following spring to thicken up any areas that didn't fully recover into healthy grass, especially if weeds are present and competing for water and nutrients.
Week-by-Week Timeline
Week 1: Nothing Visible — and That Is Normal
You have seeded, fertilised, and applied bio-stimulant. The lawn looks worse than before scarification bare soil, sparse remaining grass, debris.
Nothing appears to be happening above ground. Below ground, the seed is absorbing moisture, the seed coat is softening, and the embryonic root (radicle) is beginning to emerge.
What to do: water consistently. Morning and evening if dry. Keep newly sown new grass seed consistently moist for about 4 weeks so grass roots can establish properly. A thin layer of top dressing can help retain moisture over the seed. Do not walk on seeded areas. Do not apply anything additional, no more fertiliser, no weedkiller, nothing.
What not to do: dig up seed to check if it has germinated. Apply more seed because "nothing is happening." Panic.
Days 7–14: First Germination
Thin, pale green hair-like shoots begin to emerge from the soil. These are your first grass seedlings.
They will not look like grass yet. They will look like very fine green threads across the bare soil. This is the stage when grass starts to green up, although emergence is rarely uniform at first; warmer, moister patches will show first, shaded or drier patches will follow.
This is the moment most people feel reassured. You are on the right track.
What to do: continue watering consistently. The seedlings are at their most vulnerable in this period — their root systems are minimal and they cannot tolerate the soil drying out. Birds can also disturb exposed seed, so limiting disturbance matters during germination.
What not to do: cut the lawn. The new seedlings cannot be mown yet and the mower would pull them out rather than cut them.
Weeks 2–3: The Ugly Phase
This is the period most guides do not adequately prepare you for, and the stage where most people make the mistake of intervening too early.
The lawn looks uneven, patchy, and frankly worse than a lot of people expect. New seedlings are visible across some areas but not others. The existing grass, which was scarified back hard, looks sparse and ragged. There may be areas that still appear completely bare.
This is normal. You are looking at a lawn mid-recovery. The root systems of the new seedlings are developing below the surface. The existing grass is regrowing from its root base. The irregular appearance is because different areas germinate at slightly different rates based on micro-variations in soil temperature, moisture, and seed contact.
What to do: water consistently. Be patient. Do not add more seed to areas that look slow, they are almost certainly germinating; they are just slower.
What not to do: apply fertiliser again. Apply weedkiller. Reseed over the top because it "doesn't look like it's working." Any of these interventions at this stage will damage the developing root systems.
Weeks 3–4: Coverage Building
New grass is now clearly visible across most of the renovation area. The coverage is not yet dense you can still see soil between blades but the lawn is visibly greening up.
The height of the new grass is approaching 4–5cm in the faster-growing areas. The difference from week 1 is now striking.
What to do: continue watering if dry spells occur. In general lawn care advice often introduces regular mowing once new growth reaches 30–40mm, but for a renovated lawn it is better to resist the temptation to mow until the grass reaches 5–6cm. The first trims should protect the grass blades rather than scalp them.
Week 5–6: First Cut
When the new grass reaches 5–6cm consistently across the renovation area, it is ready for its first cut, and once it is around 30 to 40 mm tall after that, regular mowing helps the lawn thicken up.
Set your mower to its highest setting. You are taking the very tips of the blades — removing no more than the top third of the blade length. This is not the moment to cut short. A low first cut on new grass stresses the seedlings and removes the leaf area they need to photosynthesise and develop.
The first cut actually accelerates thickening. When the grass blade is cut, the plant responds by sending out lateral shoots (tillers), and regular mowing encourages more of this response over time. More tillers means more density. The lawn will visibly thicken in the 7–10 days after the first cut.
What to do: cut on high setting. If possible, collect the clippings rather than leaving them as mulch at this stage, they can smother new seedlings beneath.
What not to do: cut lower than the highest mower setting. Apply weedkiller. Walk heavily on the lawn immediately after cutting.
Weeks 6–8: Visible Transformation
By week 6–8 the lawn is noticeably transformed. Coverage is dense across most areas. The grass is thickening with each mow. The colour is deepening as the root system develops and the plant can access more nutrients.
At this stage the lawn looks significantly better than it did before renovation. The majority of the visible bare patches have filled in. Remaining thin areas are still establishing.
Gradually lower the mowing height across subsequent cuts, not all at once, but incrementally across 3–4 mows until you reach your desired maintenance height.
Weeks 8–12: Full Establishment
By weeks 8–12, the renovation is complete. The lawn has a full, dense appearance. The root system is established to a depth that gives meaningful drought tolerance. The grass is resilient to normal foot traffic.
This is what the finished result looks like, and regular maintenance is what keeps it that way after renovation.
If there are areas that have not fully filled in by week 12, assess whether the moss treatment was fully completed in those areas, and overseed in the next appropriate window (autumn or spring).
Why Does My Lawn Look Worse Before It Gets Better?
This question comes up consistently after renovation, and the answer matters.
Scarification removes the visible dead organic matter, thatch, dead moss, surface debris and exposes the bare soil beneath. The lawn you are looking at immediately post-scarification is not damaged, it is prepared. The bare soil is exactly what the new seed needs to make contact with and germinate into.
The ugly phase typically runs from day 1 to approximately week 3. By week 4, most people describe the improvement as obvious. By week 8, most describe the result as dramatic.
Knowing this cycle in advance prevents the most common renovation mistake: adding more product or more seed during weeks 2–3 when the lawn looks at its worst, which disrupts the developing root systems and delays the recovery.
How Long Does Lawn Recovery Take After Scarifying?
Scarification without seeding, done to remove thatch from an existing lawn that is otherwise in good shape, has a shorter recovery timeline than starting a new lawn from scratch.
The existing grass, which has been cut back and disturbed, typically recovers within 2–4 weeks given consistent moisture. The lawn looks sparse and ragged immediately after scarification but fills back in quickly as the existing root system pushes new growth.
If your lawn has been scarified without seeding and is slow to recover, it is likely that the existing grass coverage was thinner than it appeared, in which case overseeding the scarified area and following the renovation timeline above is the correct next step. Overseeding means spreading seed over an existing lawn rather than replacing the whole lawn.
How Long After Renovation Before the Lawn Can Be Used?
Light foot traffic (walking across to water, light garden use): after the first cut — typically week 5–6.
Normal family use (children playing, moderate foot traffic): weeks 8–10. The root system is still developing before this point and heavy traffic will damage new grass.
Full use (normal garden activity, sport, pets): weeks 10–12. Full establishment.
Will My Lawn Look Good in Time for Summer / Autumn?
Autumn renovation (September): excellent lawn by spring. Roots develop through winter, spring growth flush produces a noticeably thick, well-rooted lawn. Results are visible within 4–6 weeks of seeding but the full impact is felt in spring.
Spring renovation (April–May): good lawn by June–July. Results visible within 4–6 weeks. The lawn faces its first summer with a relatively young root system — less drought-tolerant than an autumn-renovated lawn but fully established.
Summer renovation (June–July with watering): results visible within 4–5 weeks. Good lawn through late summer and autumn with consistent watering.
What Results the GREENER Transformation Kit Produces and When
The Transformation Kit is built around the sequence that produces results within these timelines. POWER clears the moss in week 1. LAUNCH, GROWTH, and BOOST are applied simultaneously in week 3 — the correct timing for mycorrhizal fungi to be present at germination and for biostimulant to support early seedling development.
Following the sequence correctly, you should expect:
-
First germination: days 7–14 from seeding
-
Visible transformation: weeks 4–6
-
Full establishment: weeks 8–12
-
Results backed by a 60-Day Money Back Guarantee
For lawn renovation cost, professional installation with new turf typically costs £14–18 per square metre, professional renovation with seed is about £10 per SQM, DIY returfing usually runs £6–9, and renovating with The Lawn Pack can cost as little as 56p.
Get the Transformation Kit and Start Your Renovation →
Available for lawns from 100m² to 500m².
Frequently Asked Questions
How long does grass seed take to germinate in the UK?
Under the correct conditions — soil temperature consistently above 8–10°C, adequate moisture, good seed-to-soil contact, and using a spreader to spread seed evenly across the lawn — perennial ryegrass seed typically germinates in 7–14 days. Germination is faster in warm autumn soil (September) and slightly slower in cooler spring soil (April). Poor seed-to-soil contact, dry conditions, or cold temperatures will delay or prevent germination, and precise overseeding rates are usually measured per square metre.
Why has nothing happened two weeks after seeding?
Two weeks without visible germination usually indicates one of: soil temperature below the germination threshold, insufficient moisture (the seed needs consistent dampness, not just initial watering), poor seed-to-soil contact (seed sitting on moss or thatch rather than bare soil), or seed applied after moss treatment that wasn't complete. Check each of these before concluding the renovation has failed. If you need to overseed again, use 25–50 grams of grass seed per square metre. A spreader helps ensure even coverage.
Why does my lawn look worse after renovation?
The scarification process removes the visible surface layer — dead moss, thatch, and debris — exposing the bare soil beneath. The lawn looks significantly worse in the first 1–3 weeks post-renovation than before. This is correct and expected. The bare soil exposure is what allows seed to germinate. By weeks 4–6, the improvement is typically dramatic. Do not intervene during the ugly phase.
How long before I can mow after reseeding?
When the new grass reaches 5–6cm in height, typically 5–7 weeks after seeding depending on conditions. Use the highest mower setting for the first cut and for the subsequent 2–3 cuts. Cutting new grass short before it is established stresses the seedlings and slows thickening.
My lawn renovation is at week 4 and still has bare patches — is it failing?
Unlikely. Bare patches at week 4 are almost always areas where germination is running slightly behind schedule due to micro-variations in soil temperature, moisture, or seed contact. Continue watering and wait until week 6–8 before assessing. If significant bare areas remain at week 8, check whether the moss treatment was complete in those areas residual moss prevents establishment. If bare areas persist, lightly rake the surface before reseeding to improve seed contact. Overseed in the next appropriate window if needed.
How long does a lawn take to fully recover after a severe renovation?
A severely depleted lawn, heavy moss coverage, compacted soil, or near-complete loss of grass typically requires one full growing season to fully recover from a single renovation, and compacted areas may also need aeration. Significant improvement is visible within 4–6 weeks, but full density and root depth develops over the following months. Aerators create holes in the soil for better nutrient access, and a garden fork or hollow tiner can be used. Some severely depleted lawns benefit from a second renovation cycle the following autumn to thicken any areas that did not fully establish in the first cycle.
Does renovation take longer in summer than autumn?
Summer renovation can show faster above-ground germination because surface temperatures are warm, but seedlings are more vulnerable to moisture stress and the results at 8–12 weeks are typically less dense than an equivalent autumn renovation. Autumn renovation produces better results for the same product and effort because conditions favour root development over a longer period. Both timelines — 7–14 days to germination, 8–12 weeks to full establishment — apply in both seasons with correct watering. In summer, lawn feed and watering can support healthy grass and a lush lawn, but only when weather conditions stay favourable enough to avoid moisture stress.


